Deploying Rails applications with Docker and Cloud 66
I’ve spent much of my time at Icelab over the last few weeks working on migrating 14 containerised Rails apps belonging to one of our largest clients from the existing, unmanaged, Dokku based environment to Cloud 66, a managed environment for deploying apps running in Docker containers. It’s also possible to deploy Rails, Rack and Node apps directly via Cloud 66 but my only experience has been with deploying such apps within a Docker container, so that’s the focus of this post.
The process proved to not be as straightforward as I expected (perhaps partly due to the patchiness of Cloud 66’s documentation in some places) so it made sense to document my experience in the hope it’ll be useful for others tackling this exercise in future. While Cloud 66 recently announced v2 of the container-based platform, we opted to stick with v1 for this client but with any luck the niggling annoyances I encountered have been ironed out in v2.
What is Cloud 66?
Cloud 66 bills itself as “The Perfect Spot Between Devs and Ops” and is essentially a devops-as-a-service offering. In the case of this particular client, the initial decision to containerise and run their apps using Dokku was made partly because running each of these apps on Heroku (our usual go-to solution) would have been cost prohibitive, and also due to requirements for these apps to served from Australian-based infrastructure.
The key attraction of Cloud 66 was that it would allow us to continue to achieve the existing cost efficiencies we were getting from handling some of ops-related work ourselves, but would also give us the benefits of a more managed environment such as increased reliability and a lower overall maintenance burden.
At its core, Cloud 66 operates based on the concept of “stacks”, with a stack being largely equivalent to a server, although it is possible to have a stack backed by multiple VPS instances (which I’ll touch on more a little later). A stack is made up of all of the individual processes used to run your application, such as web, worker, and clock processes in the case of a Rails app.
Cloud 66 gives you the option of deploying your stack to one of a number of cloud VPS providers, including AWS, Azure, DigitalOcean, Linode, and Rackspace. In this case, we opted to stick with AWS and the Sydney region which is where the existing Dokku-based servers were running.
I found Cloud 66’s pricing structure to be pretty confusing, although in fairness this was been simplified somewhat with the release of the Container Stack v2 product; as mentioned previously, we opted to stick with v1 of the product for this client where pricing is stack-based, with each stack costing $19USD per month when paid month-to-month.
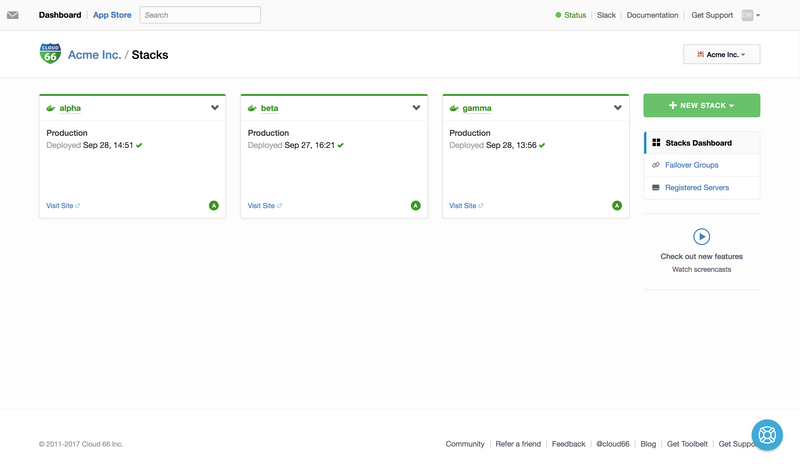
With 14 apps to migrate, many of which receive only sporadic traffic, setting up a dedicated stack for each of these would have been cost prohibitive and likely would have added to the maintenance burden over time, so we instead opted to split these apps across three stacks; the two highest-traffic apps would each run on their own stack, and the remaining 12 apps would run on the one stack in a multi-tenanted setup.

I’ve anonymised some of the data here to avoid inadvertently giving too much away (we don’t really have a client named Acme Inc., though that would be kind of neat)!
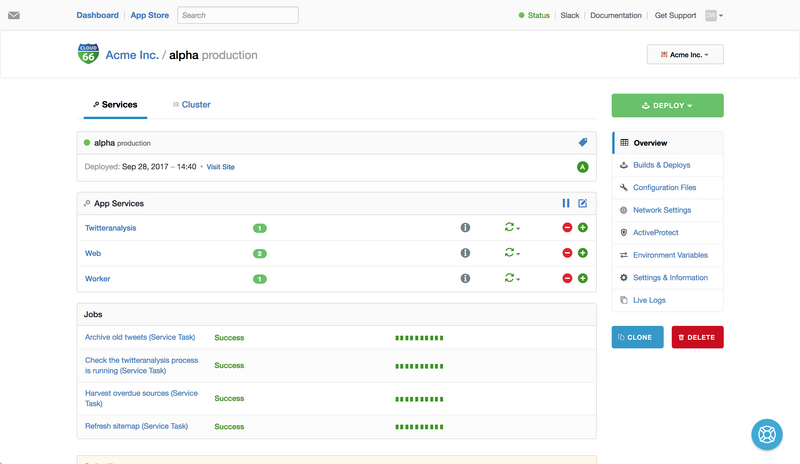
For the rest of the post I’ll focus largely on the alpha stack, which is a where a single large Rails 4 application is running, so I can go into a little more detail as to how to setup an individual stack.

Setting up a stack
At the heart of the configuration for a stack on Cloud 66 are the manifest.yml and service.yml files, which define the underlying infrastructure of your stack and the individual services that run on it.
manifest.yml
The manifest.yml file is where the individual VPS instances that make up your stack (as well as any additional host-based services) are defined. In the case of the alpha stack, this is pretty simple, with only one additional service defined (a memcached server running on the host):
docker:
  configuration:
    vpc_id: default
    docker_version: 17.03.1-ce
    has_deploy_hooks: false
    weave_version: 1.9.4
  servers:
  - server:
      unique_name: Tiger
      size: t2.medium
      region: ap-southeast-2
      vendor: aws
      key_name: Default
memcached:
  configuration:
    memory: 256
    port: 11211
    listen_ip: 0.0.0.0
service.yml
Now that the base configuration of the stack (and the underlying VPSs it uses) has been defined, the next step is to setup the internal configuration of the containers that run upon it. This is managed via the service.yml file:
services:
  web:
    command: bundle exec puma -C ./config/puma.rb
    dockerfile_path: Dockerfile
    git_branch: master
    git_url: git@github.com:icelab/acme-alpha
    health:
      type: inbound
      endpoint: "/"
      protocol: "http"
      timeout: "90s"
      accept: "200"
    ports:
    - container: 3000
      http: 80
      https: 443
    traffic_matches:
    - alpha.acme.com
  twitteranalysis:
    command: bundle exec ruby ./lib/processes/twitter-feed-analysis.rb
    dockerfile_path: Dockerfile
    git_branch: master
    git_url: git@github.com:icelab/acme-alpha
  worker:
    command: bundle exec rake que:work
    dockerfile_path: Dockerfile
    git_branch: master
    git_url: git@github.com:icelab/acme-alpha
There’s a bit going on here, so I’ll break down the configuration of the web service line-by-line as an example. If you need more detail, there’s a handy doc on Docker service configuration in the Cloud 66 docs.
command
The command used to start the container. In this case the web container is a Rails app using the Puma web server with its config defined in ./config/puma.rb.
dockerfile_path
The location of the Dockerfile to be used for building the container. In this case the Dockerfile sits at the top level of the directory.
git_branch & git_url
Pretty self-explanatory. In this case the container is being built from the GitHub source, however it’s also possible to use an existing image from Docker Hub or a private repo, by replacing the git_* declarations with image: <namespace>/<image_name>:/<tag>.
health
After tooling around with Cloud 66 for a while and deploying individual apps within the stack a few times I noticed a disturbing pattern — as the deployment process for an app neared completion, the app would become unavailable for up to 2-3 minutes, presumably because traffic was being “cut over” to the newly-launched container before the web server process within it had finished booting.
The way around this was to configure a “health check” for each app’s web container, which meant that traffic wouldn’t be cut over to it post-deployment until it was actually ready to handle requests.
Here’s the relevant section of service.yml again:
health:
  type: inbound
  endpoint: "/"
  protocol: "http"
  timeout: "90s"
  accept: "200"
The gist here is that when deployment of a container is nearing completion, a request will be made to the root path of the container and the check will wait up to 90 seconds for a response. If a 200 (OK) response is received, traffic will be cut over to the new container, otherwise the deployment will fail (this blog post from Cloud66 provides some more info).
It’s baffling to me that this isn’t the default behaviour, but perhaps this is something else that’s been fixed in v2.
ports
The port mapping for the container. In this case, the container is listening on port 3000 (which is the port on which Puma is running), with this port exposed to HTTP traffic on port 80 and HTTPS traffic on port 443.
traffic_matches
The traffic_matches config setting enables you to specify an array of hostnames for which traffic will be routed to the given container. This means you can have multiple containers on the same stack listening for HTTP requests on port 80 (for example), as long as you have each different hostnames set for each. This is useful if you want to route requests to a subdomain (say api.example.com) to one container, and requests to the main domain to another.
And that’s pretty much it. Once you have the above configuration in place it’s simply a matter of clicking the big, green ‘Deploy’ button and hoping everything goes smoothly.
Wrap up
The work to migrate these apps to Cloud 66 was seriously frustrating at times (largely due to the patchy documentation I mentioned earlier), but for the most part, the Cloud 66 support team was helpful and responded to my queries & concerns in a timely manner.
All of us at Icelab are now able to sleep a little easier knowing these apps are running in a managed environment and that should the worst happen and one of the EC2 instances or even the entire AWS Sydney location go down, we can redeploy one (or all) of them to a new “stack” almost immediately by using the existing configuration we have in place in manifest.yml and service.yml.
January 2018 update
Cloud 66 announced in November plans to sunset the Container Stack v1 product, and provided only scant detail as to how to migrate from CS v1 to CS v2. Fortunately, Cloud 66 made a further announcement this month that their plans to sunset CS v1 have been shelved and that they will continue to support v1 of the Container Stack product for the foreseeable future.