Using Zapier to automate Cloudflare cache purges for GitHub Pages sites
This website is made up of static HTML and asset files generated using Jekyll, and is hosted using GitHub Pages, primarily because using GitHub Pages makes deployment really easy — when I’m ready to publish a change to my site I simply push the changes to the repo’s gh-pages branch and the site is built and deployed automatically.
To help make the site as speedy as possible I’m serving it via Cloudflare, a Content Delivery Network or CDN. In simple terms, a CDN speeds up the serving of your site by caching its content in a number of ‘edge locations’ throughout the world (more than 150 in the case of Cloudflare) and then routing requests to your site to the edge location closest to the user, reducing latency and enabling your site’s content to be loaded more quickly.
This caching is great, but for some changes I make to my site (say tweaking an existing CSS or JS file) I want them to be reflected in a user’s browser ASAP, which means telling Cloudflare to purge the site from its cache. Unfortunately there’s no ‘built-in’ way of doing this with GitHub Pages, so for a while I’d been manually purging the cache by logging into the Cloudflare dashboard — this eventually got pretty annoying, so I started looking for a better approach.
The solution I came up with was to connect GitHub Pages and Cloudflare using Zapier, an automation tool that connects unrelated apps together in workflows, or ‘zaps’ (as Zapier calls them). GitHub supports triggering a webhook (which is essentially a POST request to a given URL) whenever certain events occur in your repository, so I figured I could use this to tell Zapier to send a purge request to Cloudflare whenever it receives this webhook from GitHub.
The process works like this:
- I push changes to the site’s GitHub repo
- When GitHub has finished building and deploying the site, it fires off a webhook to Zapier
- Zapier receives this webhook, and then sends a request to the Cloudflare API to purge the site
- Cloudflare purges the site’s content from its cache
How-to
Getting this setup is much simpler than it sounds — there are four steps to take:
- Get your API credentials from Cloudflare
- Create a ‘zap’ on Zapier to consume a webhook from GitHub
- Setup the webhook in the GitHub repo, using the target URL obtained from Zapier
- Update the zap to send a purge request to Cloudflare when it receives the webhook from GitHub
In these instructions I’m going to assume you’ve already got your GitHub Pages site being served via Cloudflare, and you have a Zapier account set up.
Getting your API credentials from Cloudflare
To be able to connect to the Cloudflare API you need three credentials:
- The email address associated with your Cloudflare account
- Your site’s ‘Zone ID’ (available on the Cloudflare dashboard)
- Your Cloudflare API key
Visit the Cloudflare dashboard for your site and make note of the ‘Zone ID’, and then click ‘Get your API key’.
At the bottom of this next page you’ll find the two API keys Cloudflare provides listed — the one you need here is the ‘Global API Key’.
Creating your ‘zap’ on Zapier
The next step is to start setting up the zap in Zapier, which will give you the target URL to provide when setting up the webhook in the GitHub repo.
From the Zapier dashboard, click ‘Make a Zap!’ to get started, and then select ‘Webhooks’ from the list of built-in apps (you’ll want to give your zap a name too). Select the ‘Catch Hook’ option and then continue.
This next step enables you to parse a particular key from the payload that’s sent to the webhook URL. You don’t need this so simply skip this and continue to the next step, which will give you the webhook URL that you need to provide to GitHub. Copy the URL (which will look something like https://hooks.zapier.com/hooks/catch/6518276/e5r48p/) and then continue.
At this point Zapier will start watching for a POST request to the above URL, so switch over to GitHub to setup the webhook there.
Setting up the webhook in the GitHub repo
Jump into the settings tab of your repo, click the ‘Webhooks’ nav item, and then ‘Add webhook’ — it’s on this page that you need to input the URL provided by Zapier and set any other required config:
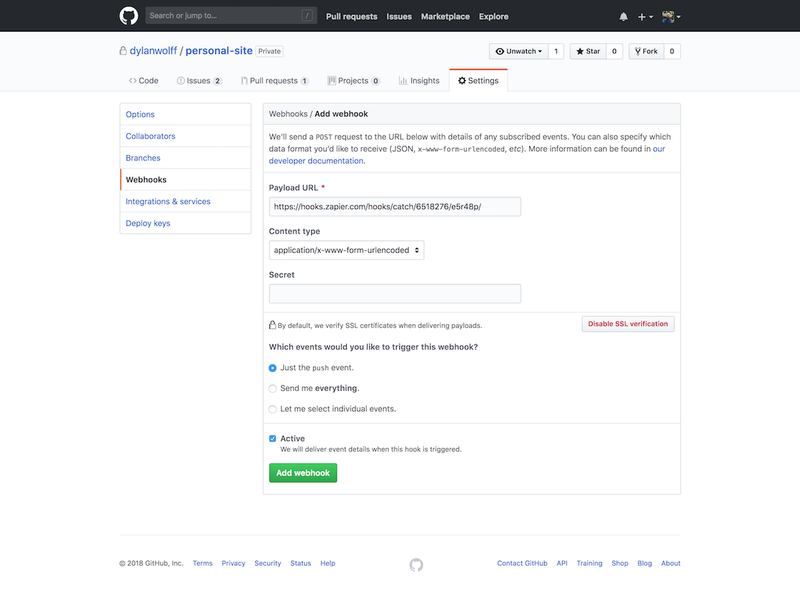
GitHub allows you to trigger a webhook in three different scenarios:
- A commit is pushed to the repo
- Any activity at all takes place in the repo
- A selected event occurs in the repo
By default, GitHub will trigger the webhook whenever a commit is pushed to your repo. If you’re using the gh-pages branch as the default (which is automatically built and deployed when a commit is pushed) this is fine, but I’d suggest tweaking this behaviour so it won’t be fired unless you’re actually deploying the site.
To do this, select ‘Let me select individual events.’, then check ‘Deployments’ and uncheck any other options that are selected.
Now hit ‘Add webhook’ and GitHub will trigger a test webhook. All going well, if you switch back to Zapier you should see that the test webhook was successfully consumed by Zapier:
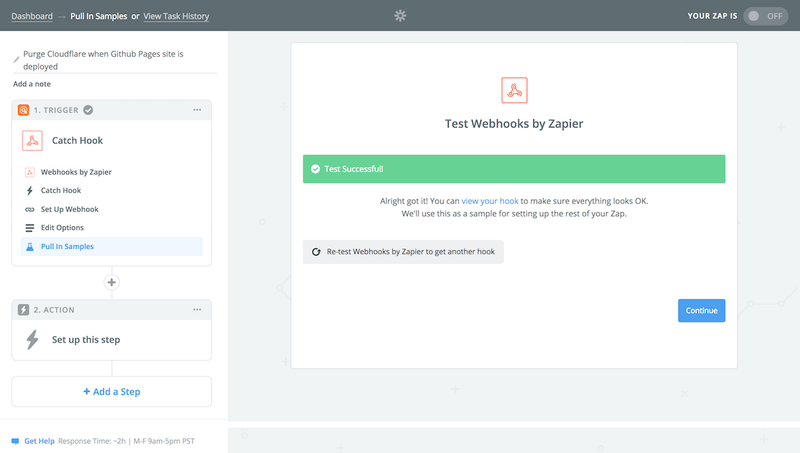
Now that Zapier is successfully consuming the webhook that’s being sent by GitHub, you need to tell it what to do when it receives it. For this next step, you’ll need your credentials for the Cloudflare API.
Configuring the zap to send a purge request to Cloudflare
You now need to configure your Zap to send a POST request to the appropriate endpoint of the Cloudflare API to purge the site’s content whenever it’s deployed. Ideally, in this step you’d only purge those files that have changed, however, unfortunately the webhook triggered by GitHub doesn’t provide this info. Instead, purging everything will have to do — this is done with a POST request to the Purge All Files endpoint.
The action step here will again use ‘Webhook’. Given some specific payload-formatting requirements of the Cloudflare API, you can’t use the basic ‘POST’ webhook but instead need to select ‘Custom Request’:
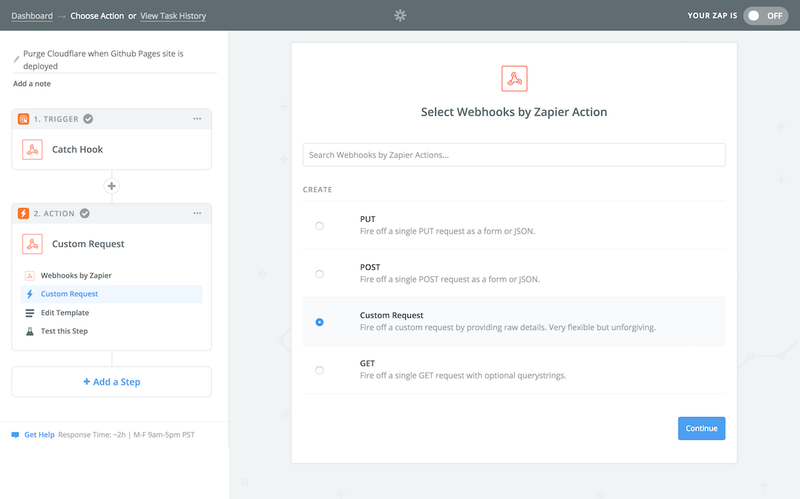
Select this option and then continue to the next step, which is where things get a little more involved!
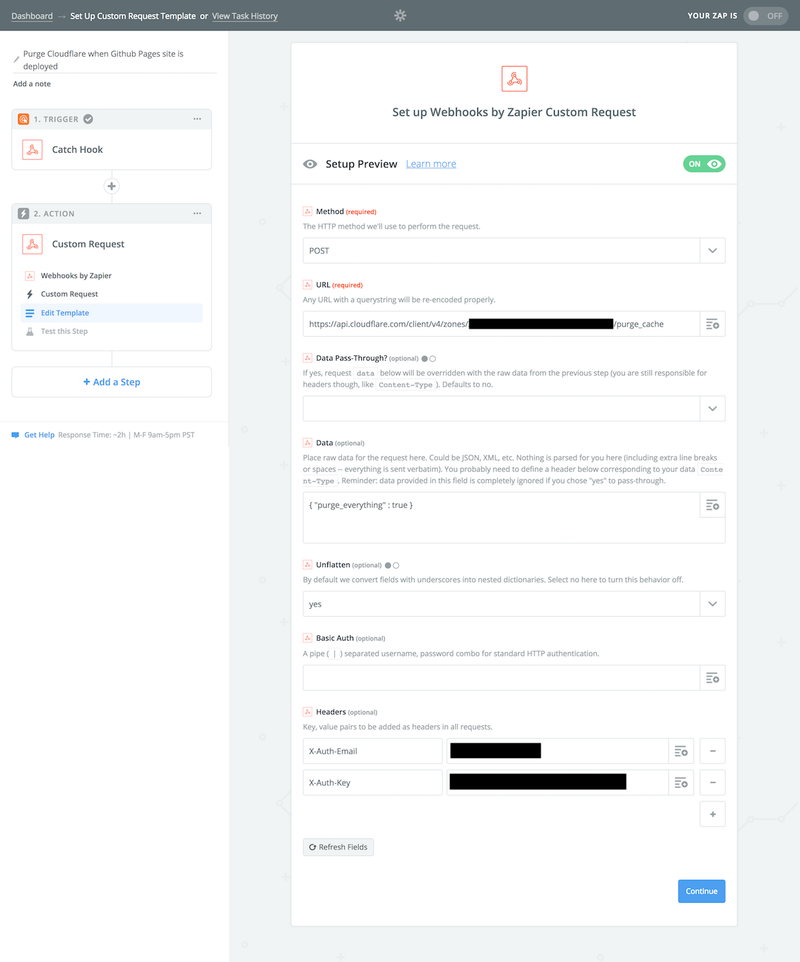
- From the ‘Method’ field, select ‘POST’
- In the ‘URL’ field, supply the Cloudflare API endpoint to be hit, along with the ‘Zone ID’ you noted down earlier. For example, assuming your Zone ID is
12345678, this URL will behttps://api.cloudflare.com/client/v4/zones/12345678/purge_cache. - To instruct Cloudflare to purge all of your site’s content when hitting this endpoint, a specific payload needs to be sent. In the ‘Data’ field, enter
{ purge_everything: true }. - You then need to set two headers in order to authenticate with the API:
X-Auth-Email- the email address associated with your Cloudflare accountX-Auth-Key- the Cloudflare API key you retrieved earlier
With the webhook setup completed, the config should look something like this:
Continue to the next page, where you can then test your webhook. All going well, you should see that the test was successful:
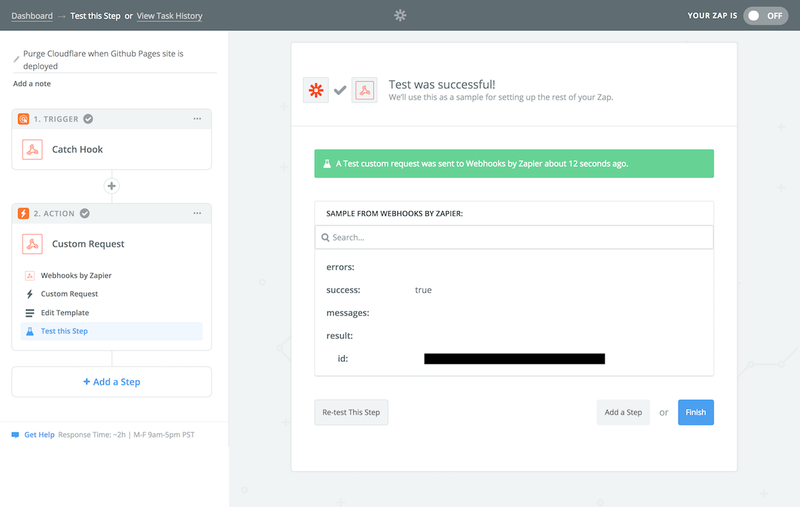
Hit ‘Finish’ and turn on your zap. Once that’s done, the last step is to check that it’s working:
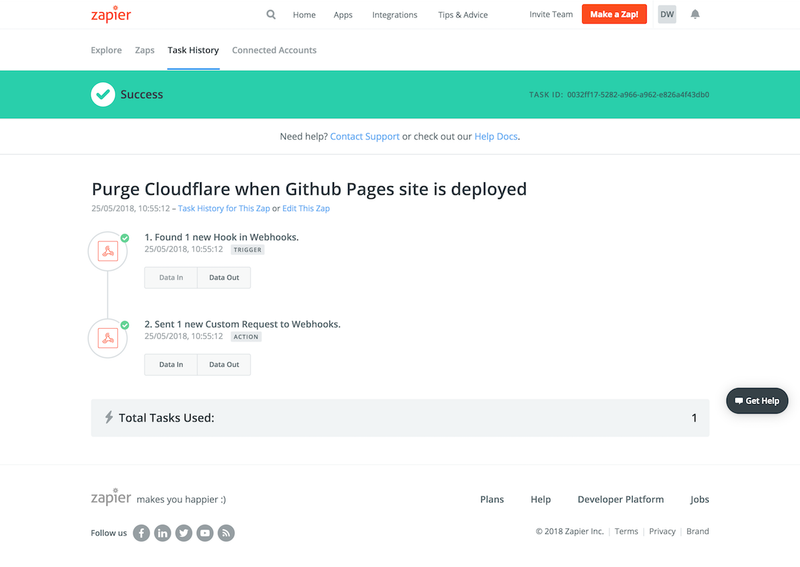
Success! Cloudflare’s cache is now being purged automatically whenever your GitHub Pages site is deployed.